Friday, October 7, 2016

Crazy Bird Halloween

Wow hard to believe we are already into Fall and into October of 2016! When the new Halloween releases came out a few months ago from Tim Holtz I thought the coffin would make a great birds nest! I had the Crazy Bird(s) die cut from earlier this year but had not used them. So I envisioned them nesting inside the coffin Mr. & Mrs. building a theme around it from there. I used one of Tim's Shadow Boxes and decorated the inside from his new Ideology Paper Stash 8 x 8 for Halloween. I used two different patterns to add some variation. I also used his new Halloween Ephemera Pack images in this piece. I used last years Halloween Paper Stash to outline the outside of the coffin to give it a more defined wood look than added a grit paste with a brown texture to add the effect of aging.

Used Tim Holtz recent release of his Halloween pumpkins and bones. #HalloweenCoffin. The little light is from past Ideaology Collection. #CrazyBirds #Nesting #Whattheheck #Home #Halloween
Corner Decorations from Ideology line as well. I added some sprayed speckled branches and white spider cotton decoration. #HappyHalloween!! To get the coffin to fit into the Shadow box I cut the backside off.


 Thanks for stopping by,
  Jan

Tuesday, July 19, 2016

Finding your Center and Keeping It!

I have days where I find myself questioning my objectives, my talents and dreams. I think we all have those days from time to time. I look back to five years ago and I had much more free time than I do now. I now call what use to be free time as planned time. Objectively speaking I do my best to find that no matter what. When I returned to doing art five years ago I found it to be very grounding. As in like for all the years I wrote and devoted all my time to writing I found greater refuge in my art. Over the years since my twenties I longed to find the mediums to bridge together my Inspirational Poetry with Mixed Media Collage Art. Twenty years ago I had no name for such mediums, as I do today. I believe we are given gifts to hone and shape. It is up to us whether we bring them into their maturity and dedicate one's self to the cause that spurns the vision in creating.

So my journey is twofold. I love Assemblage Art and Mixed Media Collage Art. I started five years ago by stepping into the scrapbook world and finding my way through that. I was never much of a stamp person or card making person. Then I found I really liked the hands on aspect of creating assemblages. From there I started to take some classes with Kelly Rae Roberts. There I found and expansion of creating that freed me further. I don't consider myself a freestyle painter as I would like Flora Bowley. I find her work effortless and beautiful. I have also come to understand I have no desire to be like Kelly Rae Roberts either. My vision for my dreams began over thirty years ago. The impetus to finding my medium of sorts that brings my talents forward into today is my path. The other classes I have taken were from Tim Holtz his Creativity Chemistry 101 & 102, and soon 103! There is much to be gleaned from his teachings so if you have not checked these classes out I suggest you do!!!

I had the good fortune to travel down to San Jose to the Island Escape this past weekend and take an assemblage class from him for the afternoon along with thirty some odd other folks. What a fantastic teacher he is!!! I picked up new things and really enjoyed the class!! In the past five years of expounding boundaries and immersing myself into other mediums I love the fact they all more or less can crossover and be used in various ways. Finding one's center is built upon the practice of doing and keeping with it! I will soon add a verse to this piece as I continue dancing with the elements I find as I go.


Thanks for Stopping By,
Jan


Friday, May 6, 2016

Becoming an Artist


Becoming an Artist:


I don't feel we become an artist overnight. It is something we strive for stealing moments in-between busy schedules carving out niches of time to expel the desire from within to the canvas. Colors attracting me like a magnet to use them in some formation of an expression yet to come together. It is in the dance of time and timelessness that gathers such formations into desires of creations that create the canvas into a deeper expression at times than one can imagine.

Becoming artistic like any craft takes time and practice, mistakes and redo's. Always in the back of my mind I am planning for the end of my day to find my time to practice my craft. I am a mixed media artist! Art has always been my counterbalance in life just as much as my poetic gift was my language and heart for many years. Gathering a method to combine the two was sought when I was very young through various mediums to what is now the gathering of differing mediums that actually do come together. I had to go out on a limb and challenge myself by investing in the art I desired to become better at. I have no formal training other than art classes in junior high and high school. That type of learning did not bring me closer to what I desired or sought. It is in the latter half of my life that I find the willingness and constant thread in the action of doing and performing that highlights the contrast from then to now. It is always in the actuality of the freedom in becoming the fullness of an artist that completes the desire now to what was lacking then. I have patients now with the intuitive hunches that guide me. In the silence of viewing all the unfinished pieces I will find the next phase to the piece I am focused on.

Becoming an Artist is defined by the interest of intent, the practice of the medium and act of creating in and of itself!!!

Thanks for stopping by!!

Jan

Friday, April 15, 2016

Stuck Like Glue Project


Me and You Stuck Like Glue Project


I wish I was more faithful at blogging but hopefully my intent to do so will change that in the coming weeks and months. I recently made this sweet little project using Tim Holtz's new Framed Panel. I really love these new panels since they are versatile to allowing any type of mixed media product to be used for diversifying the backgrounds such as this one. I used Vintage Wallpapers remnants I had left over from another project for the background. I also used Tim's Thinlits Wildflowers Die Cut. I painted the frame using Tim Holtz Distress Paint Crushed Olive. Once it dried I used Tim's new product Distress Collage Medium Crazing on both the frame itself and on the background. I later used Vintage Photo Distress Pad on the Frame to distress it a bit as well. I also used Tim's new Distress Crayons Vintage Photo on the background. I smeared in various areas the Vintage Photo giving more of an aged look to the background. The wording comes from Tim's Chit Chat Words Occasions.

The picture of the Siblings (at least I am assuming) are from Tim's Found Relatives. I used a variations of colored sprays on Tim's Watercolor Card Stock which I later used for the Wild Flower Die Cuts. The Butterfly I later rubbed on in the background I had. The image of the small birds sitting on the branch I had from left overs. The small brass tarnish star is from Finnabair by Prima.


Thank you for stopping by!!

Jan

Thursday, December 31, 2015

Gratitude


Gratitude

This little project sat around over the holidays waiting to be born into what it became. I love using this little gal from the Tim Holtz Found Relatives. I love working with this image in many of my projects. This go around I dressed her up and used Tim Holtz Wings for her Angel wings. I used Deco Art Crackle on them as well. I later used Gold Distress Paint softly wiped over the crackle after it dried. I used Tarnished Brass Distress Paint on the top of the clipboard. I let that dry then I lightly sanded it.

For the background paper I used Tim Holtz Christmas Paper Stash. I lightly sanded the sheet after it was adhered to the small clipboard. I used the word Remember as a noted reminder to always be grateful. The small red lettering I had lying around so I decided to put it to good use. I used Crinkle Ribbon at the top with the small coin that reads, Cherish. Her little Halo is a wreath release this holiday again by Tim Holtz. I used Tarnished Brass on the wreath.

Wishing everyone a very Happy New Year! Here is to a creative 2016.


Thanks for stopping by! Jan


Peter Rabbit Christmas

I made several if not many Holiday projects with the intent to finish every single one of them. I started altering this Tim Holtz Clock late last year but never finished what I had in mind. I eventually set it aside and thought why not finish it this go around so I did. I first covered the clock in Tarnished Brass Distress Paint, and later used embossing powder in the color Rust onto the body of the clock, legs, bells and handle. I later rubbed some of the embossing off and found this idea from Paula Cheney! I sprayed a sealer over the entire close to hold in the embossing.

In the inside of the clock I used Tim Holtz Christmas Paper from this years Paper Stash. I sanded the edges around the inside of the back cover and used Deco Art Crackle over the images on the background. I then took some Vintage Photo Distress Ink and went lightly over the background. The Merry Christmas wording is a thinlit from Tim Holtz and the Christmas Tree. The two small cabin I had cut out from somewhere earlier in the year! The little Peter Rabbit images I had and and cut them to fit into the scene. The little trees I bought off Etsy. I used Crinkle Ribbon by Tim Holtz for the clock. The little pinecones I bought off of Etsy as well. And a dab of Snow Tex for the snow.


Thank You for stopping by!!! Jan

Thursday, December 17, 2015

Christmas Village

Christmas Village

When Tim Holtz released his new die cuts the Village Collection from Sizzix.  I became very interested in making a tiny village for the Holidays. I had set aside my crafting for mixed media painting for awhile. When I started my village I realized I would need a thick card stock so I used the Farm House Christmas Mix and Match for my houses(http://shop.canvascorpbrands.com/collections/christmas/products/mix-and-match-pad-farmhouse-christmas.) Tim has recently make a video on how to assemble the village houses on his blog if anyone is interested: http://timholtz.com/sizzix-village-collection/

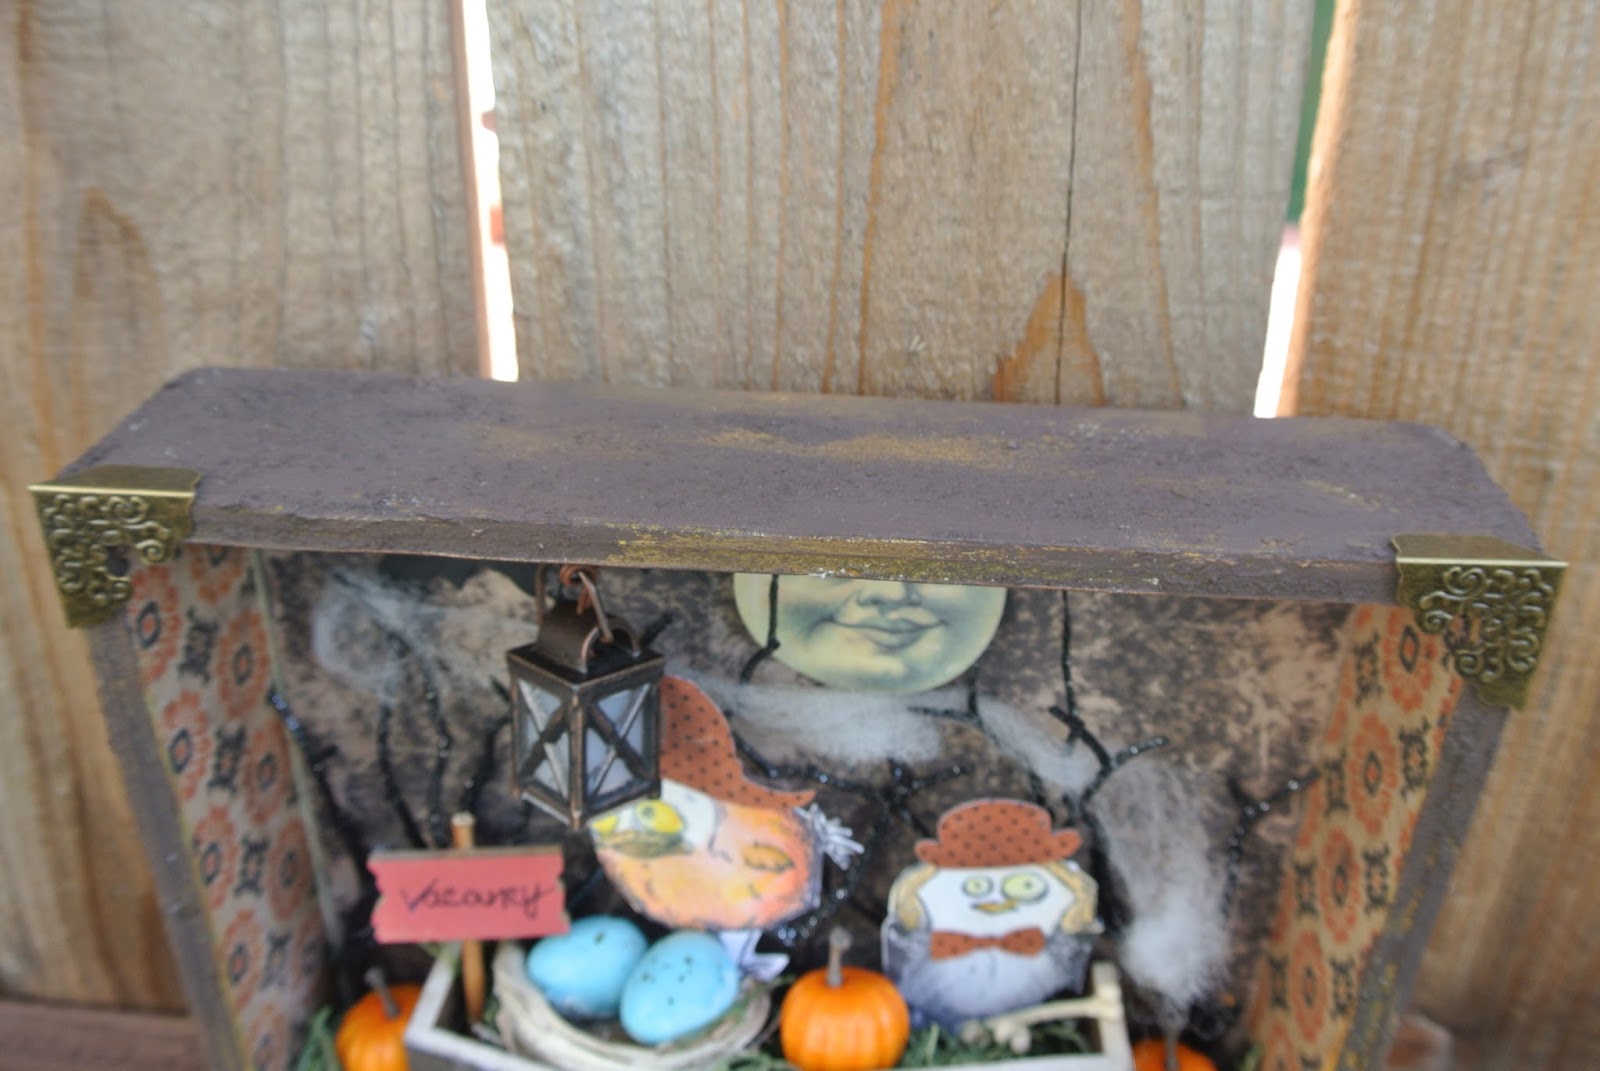
I originally started with a piece of a pine round from our property but then it cracked so I later bought a round piece of wood with the bark intact from World Market. I sanded the top of it and then used Deco Art Media Fluid Acrylic Transparent Yellow Icon Oxide transparent paint. I later added over it Deco Art Media Crackle Glaze over the painted surface. I love working with these products!  I later took some white acrylic paint and gently wiped over the crackle to give some definition to the surface with a very soft cloth.

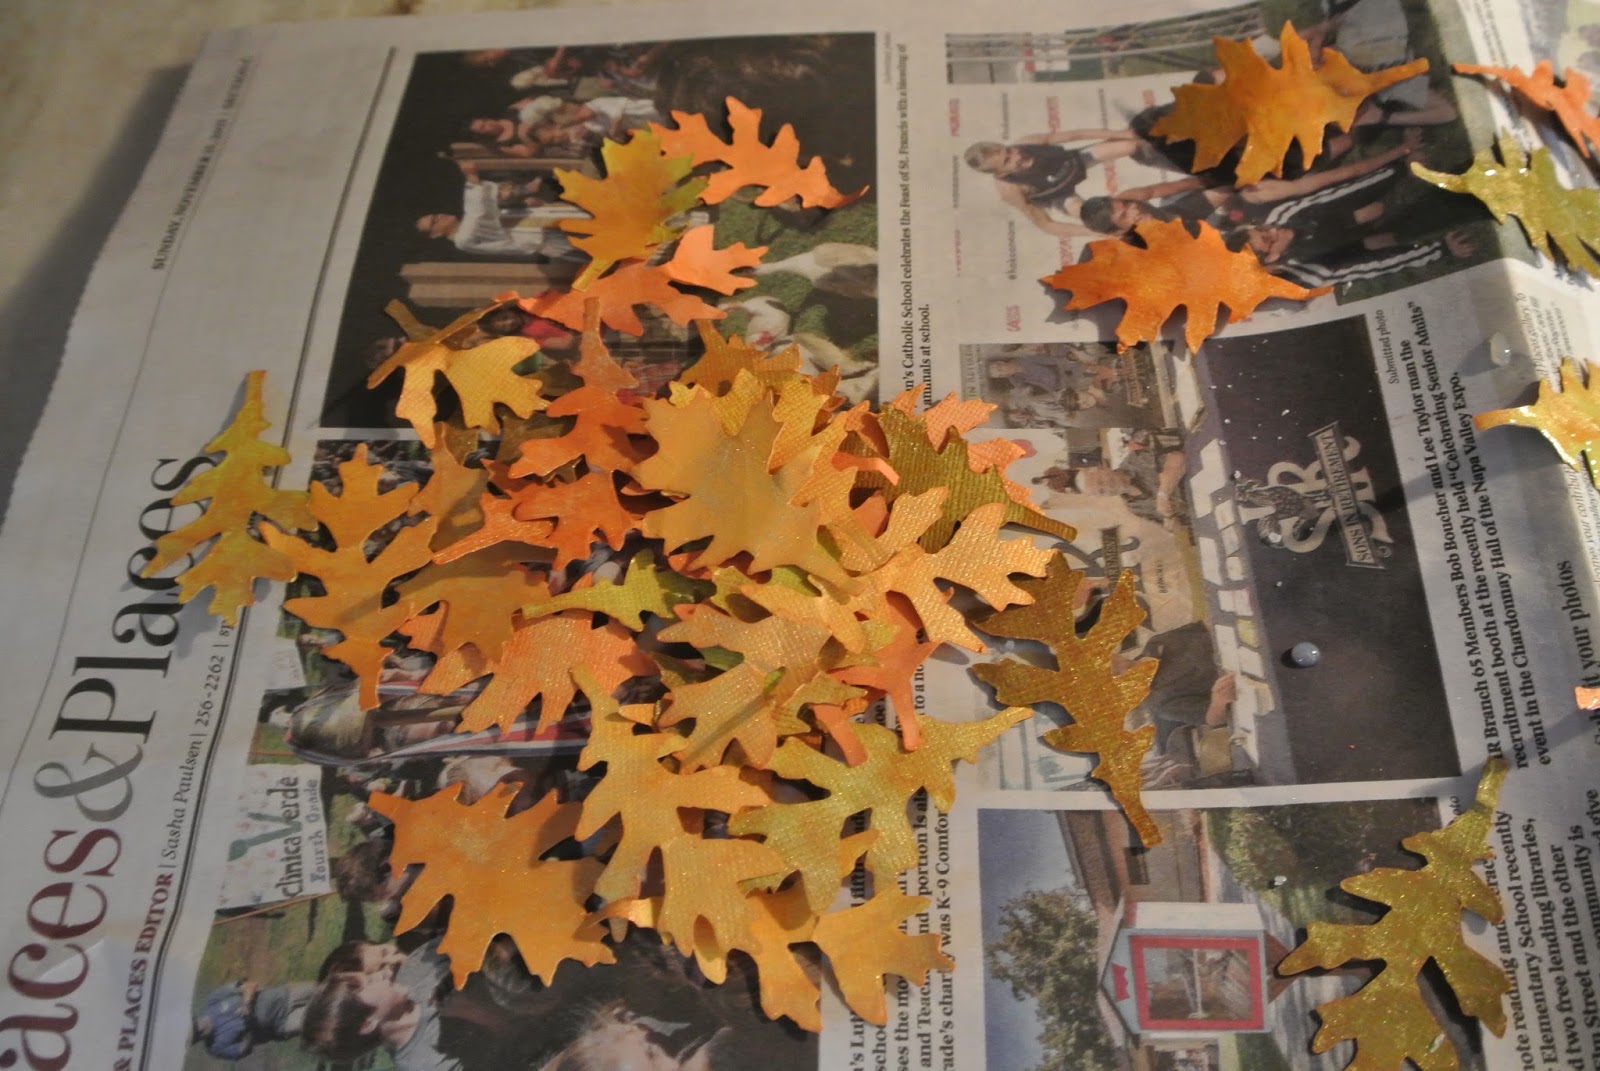
I later sprayed it with a clear sealer. I used two products for the snow. The small wooden fence I bought at Michael's also with the small animals on either side of the Village houses. The leaves are from Tim Holtz small dies and I used the Kraft Core papers that I sanded the surface on. The I scrunched them and put them in a little plastic baggie with different colored alcohol inks by Ranger/Tim Holtz product. Then took them out and let them dry. I later put the Deco Art Crackle on each of them with a small brush. I used Snow Tex for the snow, along with SnowFlake Paste on the fence by Finnabair.

The tiny house I hand painted with Deco Art Media Fluid Acrylic Transparent Yellow Iron Oxide, and Quinacridone Gold. I then painted Deco Art Media Glaze over the Transparent Colors. I have entered this in the Deco Art Contest: http://decoart.com/mixedmediablog/article/162


Merry Christmas and Thanks for stopping by!!! Happy New Year to all.

Jan

Thursday, December 3, 2015

Holiday Shadow Box


Shadow Box

Happy Holidays to everyone! I have been working on several projects some from sometime ago to most recent. The project today I started a few weeks ago. I bought the small pine shadow box wood piece from Michael's. I painted the wood with a green chalk paint and later sanded down the edges for a more rustic look.

                                                                                                                                                                                         I used Tim Holtz Ideaology Paper Stash 8 x 8 Yuletide for the backgrounds. I used his Christmas Words (Rub On) as well in the background.  I used Silver Distress Paint and the new Distress Glitter Vintage Platinum on the Letterpress Wording (also by Tim Holtz).  I later sanded down the Distress painted letters. I used the Christmas Tree die cut & Wings that are by Tim for added embellishments. On the tree die cut I used the Glitter Vintage Platinum.  On the Wings I used GoId Distress Paint and later Deco Art Media Crackle Glaze.  I also used Wendy Vecchi's mini pine trees. The little fractured doll is by Bo Bunny and Tim Holtz.  I used pink lace wrapped a few times on one of the dolls her to soften the appearance.  I used some Mushroom Alcohol Ink on the dolls for aging the look of them. I learned this from Paula Cheney a few years ago!)  

The trophy cup is from Tim’s line Ideaology and was painted with Tarnished Brass Distress Paint.  The small star I added along with the mini pinecones I found on Etsy. The little red wagons I found at Michaels and added some Rock Candy Glitter to them. I used Snow Tex for the snow effect in this piece in various areas. The watch piece is from Tim Holts line and the Santa I had as a random scrap piece which I added on the inside. I did distress the out of the clock with Metallic Lustre by DecoArt called Copper Kettle.  The hanging snowflakes were distressed with Snow Cap and Stream Alcohol Inks.


Thanks for stopping by!!! Merry Christmas Jan